


So you’ve finally gotten your beautiful wooden flooring installed, and everything looks perfect! Sleek, sophisticated, and with a distinctive charm, it feels like a dream walking on these striking hardwood floors. But as with any flooring option, wooden flooring can accumulate dirt and debris on a daily basis, and it is up to you to ensure that your floors are kept clean, both from allergens and dirt, but also debris that can scratch up your beautiful flooring if not removed.
But as with any major investment, it can be rather confusing to know exactly what to do to take care of your new floors. While a simple search on the internet will yield you loads of information on the different ways to clean your flooring, not all of it is actually recommended and some of it may actually be detrimental to the life of your hardwood floors. In order to ensure that your cleaning procedures are both gentle and effective, consult with your installer and familiarise yourself with the manufacturer’s care instructions and suggestions. Doing this will help you put together a floor care plan that is not only less fuss, but will keep your floors looking spic and span without damaging their beautiful look.
Of course, you can also use a light vacuum to remove dirt on floors – but ensure that its usage will not create scuff marks on the surface of your flooring with each pass of the vacuum. Heavier vacuums are not suitable for hardwood floor cleaning because of this, and if you want to prolong your floors looking their best, it’s a good idea to avoid them altogether in the parts of your home with hardwood flooring. Aside from this, avoid using vacuums with rotating bristle bars. If there is a floor brush attachment, use that instead!
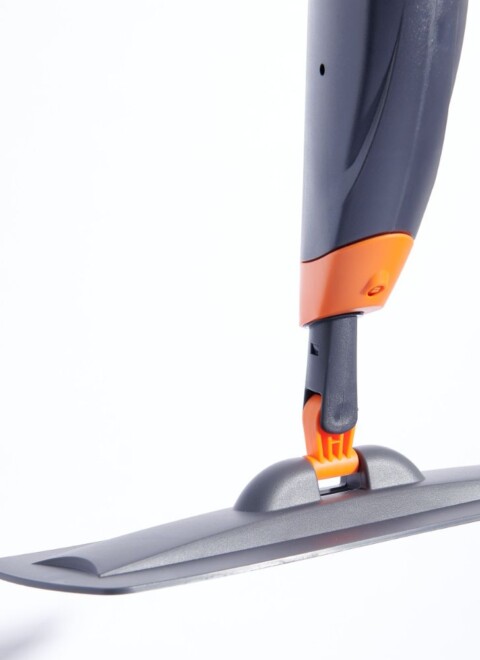
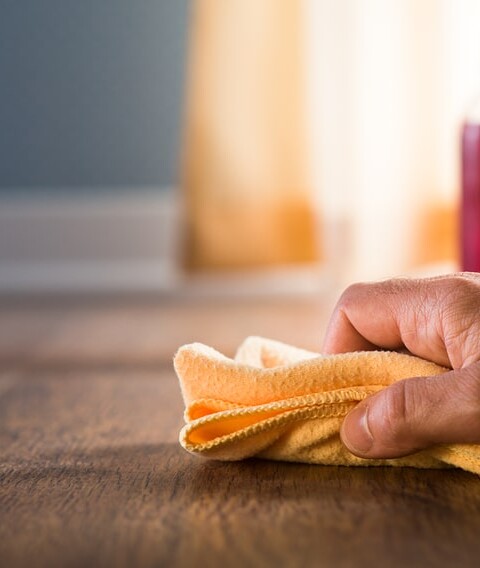
After sweeping or vacuuming, you can ensure your engineered oak flooring maintenance by following up with a damp hardwood mop from just water. Remember that hardwood floors’ worst enemy is moisture, and really make sure that your hardwood mop is damp and not dripping. This is not only important to prevent moisture damage and the warping of your floors, but also to clean away dirt, stains, and other assorted debris that may not have been caught by sweeping or vacuuming. After mopping, it’s always a good idea to wipe down your floors with a dry towel to reduce your floor’s exposure to moisture, no matter how little. And with heavy foot traffic areas of the home, it’s recommended to mop at least once a week so that you can keep on top of your floorcare.
Easy Ways To Keep On Top Of Your Floorcare
Taking care of your new European oak flooring need not be complicated! All you need is a soft bristled broom or sweeper, a hardwood mop, and a manufacturer-approved cleaning or cleaner kit for spots that are a bit harder to clean with just your regular cleaning implements.
A soft bristled broom is recommended to sweep away dirt and dust particles that are not only the cause of allergy flare ups, but can also damage your floor’s finish, if it is left to scrape against its surface. Soft bristles ensure that dirt is cleaned away gently, and this is recommended to be done regularly, and even more frequently if the room sees heavy foot traffic.
Best Way To Clean European Oak Flooring
Regular maintenance of European Oak flooring is important, but sometimes accidents happen and stains can occur on your beautiful hardwood floors. Regardless of whether or not you have solid timber flooring, or engineered hardwood flooring, it is important to note that you can also do a deeper cleaning to combat grime that comes with regular use. A reputable installer will provide you with their wooden flooring specifications and care information, and what types of cleaning products are appropriate for use on their offerings. And while there is a wide variety of commercial cleaning products available for floor care, remember to read the labels and only use those that are specifically made for your type of flooring, whether it is engineered hardwood or solid timber.
Cleaners are best used with rag mops or sponge mops that are only damp, and not dripping wet. The rule is always to minimise your floor’s exposure to moisture, after all! With the mop, clean the floors with your chosen solution, and mop again with clean water to remove residue and remaining product. And as with your regular mopping procedure, finish it up with a wipe of a dry towel to minimise the moisture on your floors right afterward. Not only will this remove stubborn stains, but your floors will look shiny and well taken care of if this is done properly.
What is the process?
Sanding entails first punching all the nails down below the floorboard surface. This is to ensure an unhindered sanding process. Starting with a coarse grade sandpaper, a floor sander will be used to sand back existing floor finishes, coats, stains, and varnish. Moving on to medium grade sandpaper to further buff away prior coats, a specific tool called a edge floor sander will be used for hard to reach edges that the main floor sander is not able to get to.
After this initial sanding process, punched holes will be filled in with floor filler to ensure a smooth surface with no holes.
Finally, a fine grade sandpaper is used to finely smooth the wooden surface, and buff away excess floor filler. If you are after a new stain for your wooden floors, this is when this will be applied!
Once this sanding is complete, then comes the polishing. Using a base coat that will seal the timber, your wooden flooring should be allowed to dry overnight for best results. This seals the open nature of your timber flooring and gives it time to create a proper barrier that will help the longevity of your chosen finish. It is worth noting that this base coat may need to be sanded back with a superfine grade sandpaper to equalise the timber grain, before new coats are applied. Each coat takes about a day or two to dry if you are using solvent-based solutions, whereas waterborne polyurethane is quick drying within 8 hours, and you should be looking at at least 3-4 coats applied.
Floor Care Tips
Aside from regular cleaning, there are a few ways you can keep your floors looking their best for longer. See if you can encourage family and guests to remove their footwear before entering the house to minimise mud and dirt tracking on your hardwood floors.
Aside from this, place doormats at your home’s entrances and exits so guests have somewhere to clean the soles of their shoes before entering, limiting the moisture and dirt that gets into the home. Keep in mind that if you choose to place rugs on your wooden flooring, veer away from rugs or mats with rubber backing. While a rubber backing may prevent these from sliding around on your floors, it can cause damage on the surface of your flooring, borne from friction and trapped dirt underneath.
In the same vein, you can prevent scratches on your flooring by placing long runner rugs in hallways. Having that extra layer of protection will not only prevent the odd scuff from heavy foot traffic, it can also add a distinct look to your interiors. And lastly, you can never go wrong with placing floor protectors under your furniture – there’s nothing worse than accidentally bumping into your couch and causing a deep gash in your hardwood flooring!
Related Articles
View all articles
Common Mistakes People Make with Floor Sanding Melbourne